DIY Living Christmas Wreath with Succulents

DIY Living Christmas Wreath with Succulents via Needles + Leaves

It's the most wonderful time of the year! Christmas Time! As a crafter at heart, I just can't help but create projects out of all the festive scraps lying around the house during the holidays.  After setting up our Christmas tree this year, we had a bunch of fir trimming left over from the bottom section of the tree. My first thought was, "Perfect! I can make a wreath!" Naturally, I wanted to incorporate succulents for a little something extra! Here is a quick tutorial for you, so you can make a wreath out of your tree trimmings too! 

Supplies: 

Metal Wreath Frame

Sphagnum Moss

Twine/Jute

Floral Pins

Christmas Tree Trimmings

A Few of Your Favorite Succulents 

Supplies needed for DIY Living Christmas Wreath with Succulents

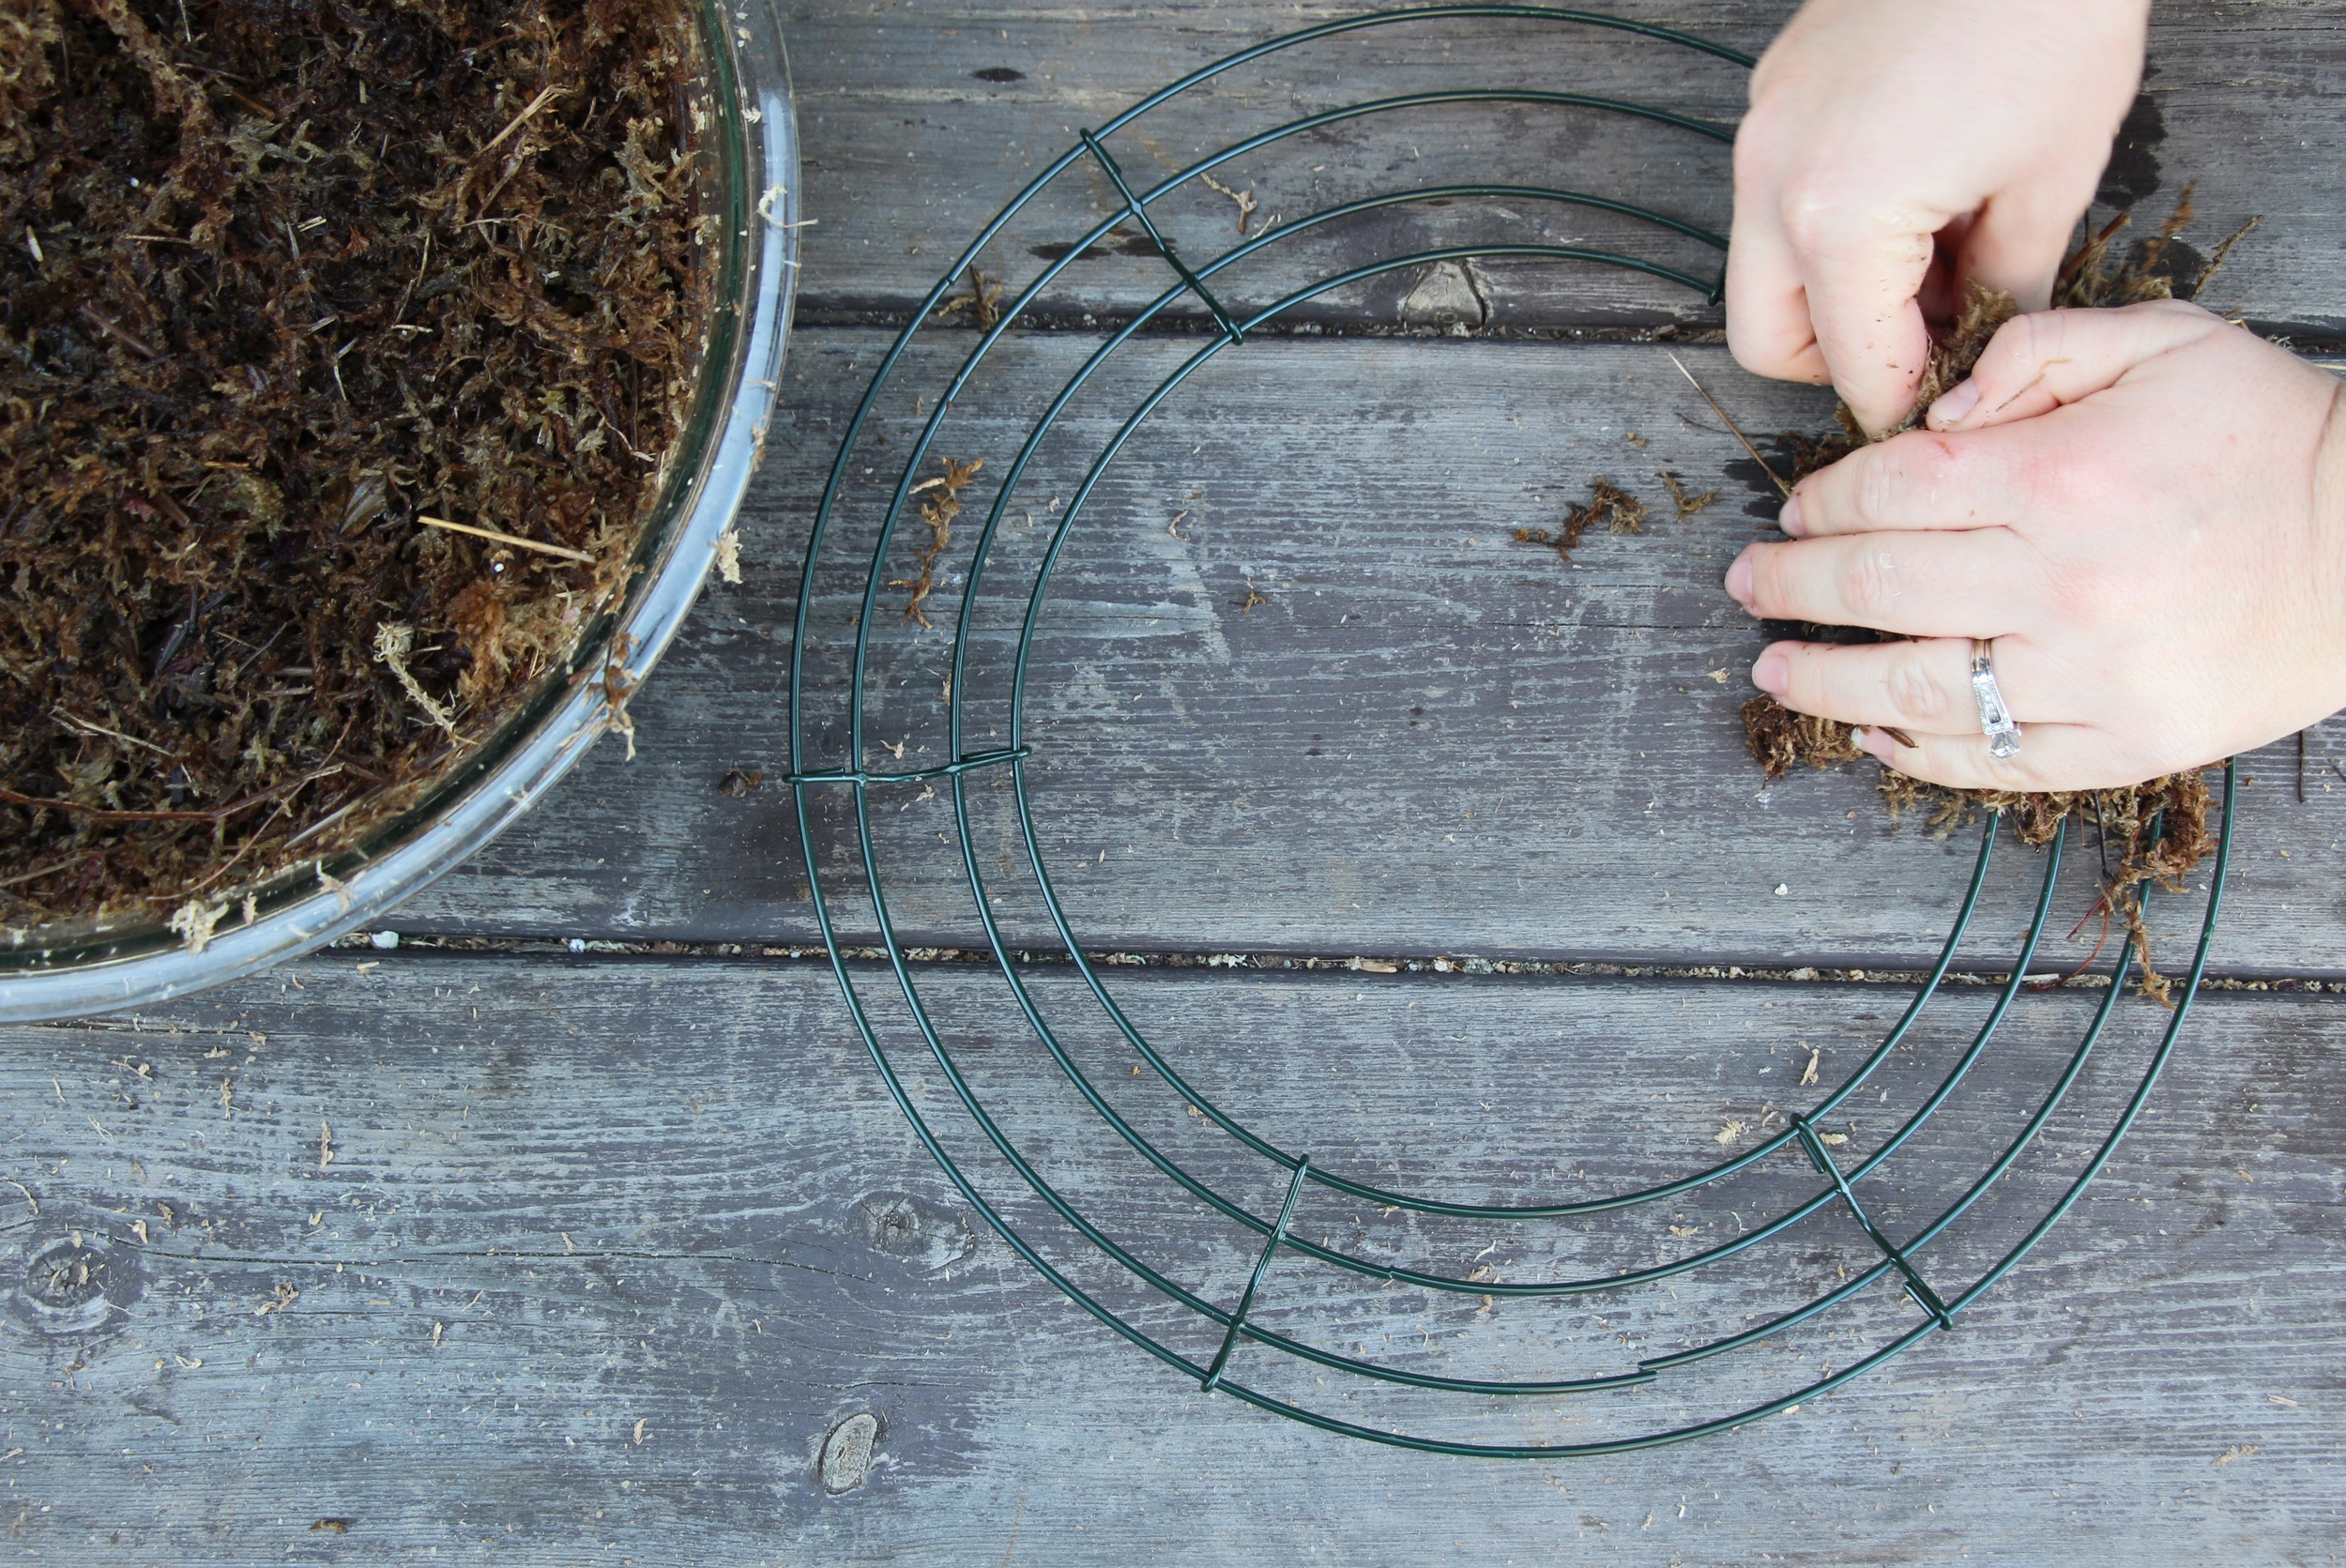
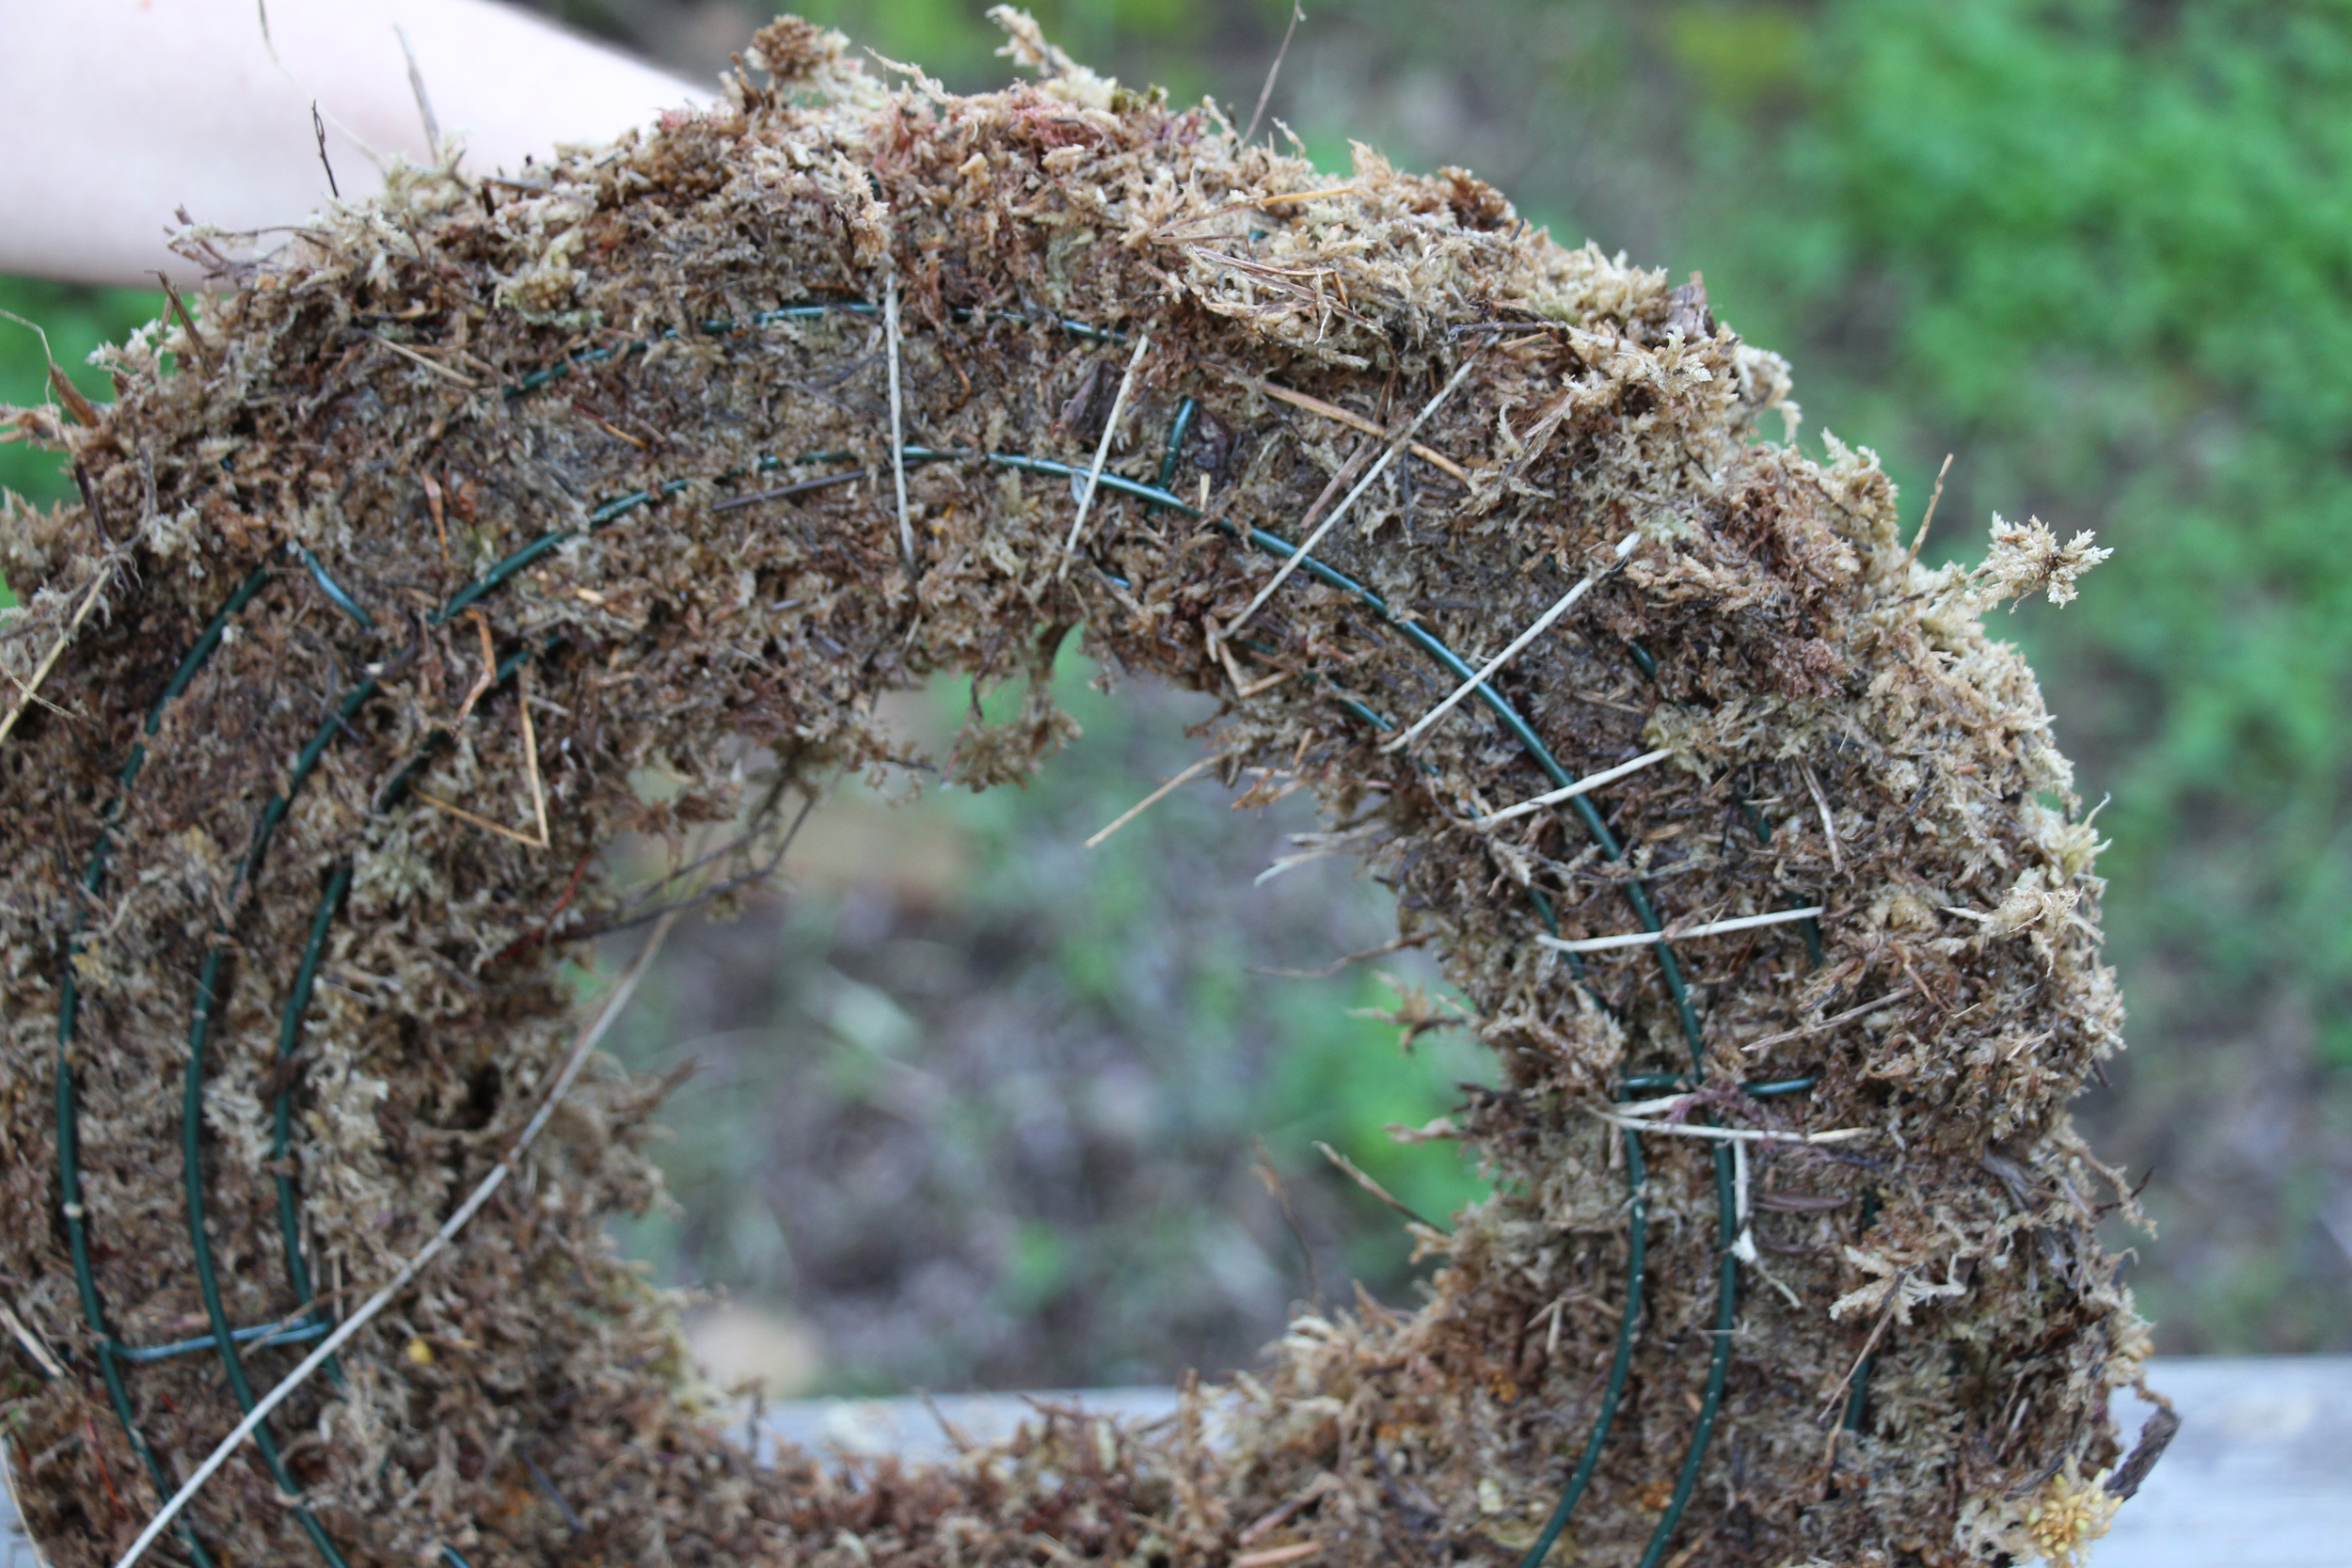
We decided to make a sphagnum moss wreath frame to create a living wreath, as opposed to just wiring our fir timings and succulents to a metal frame. Succulents can root and even thrive in sphagnum moss alone, and we figured if a cut Christmas tree can last for a month or two in a bowl of water, trimming should last just as long (possibly longer) in moist moss.  

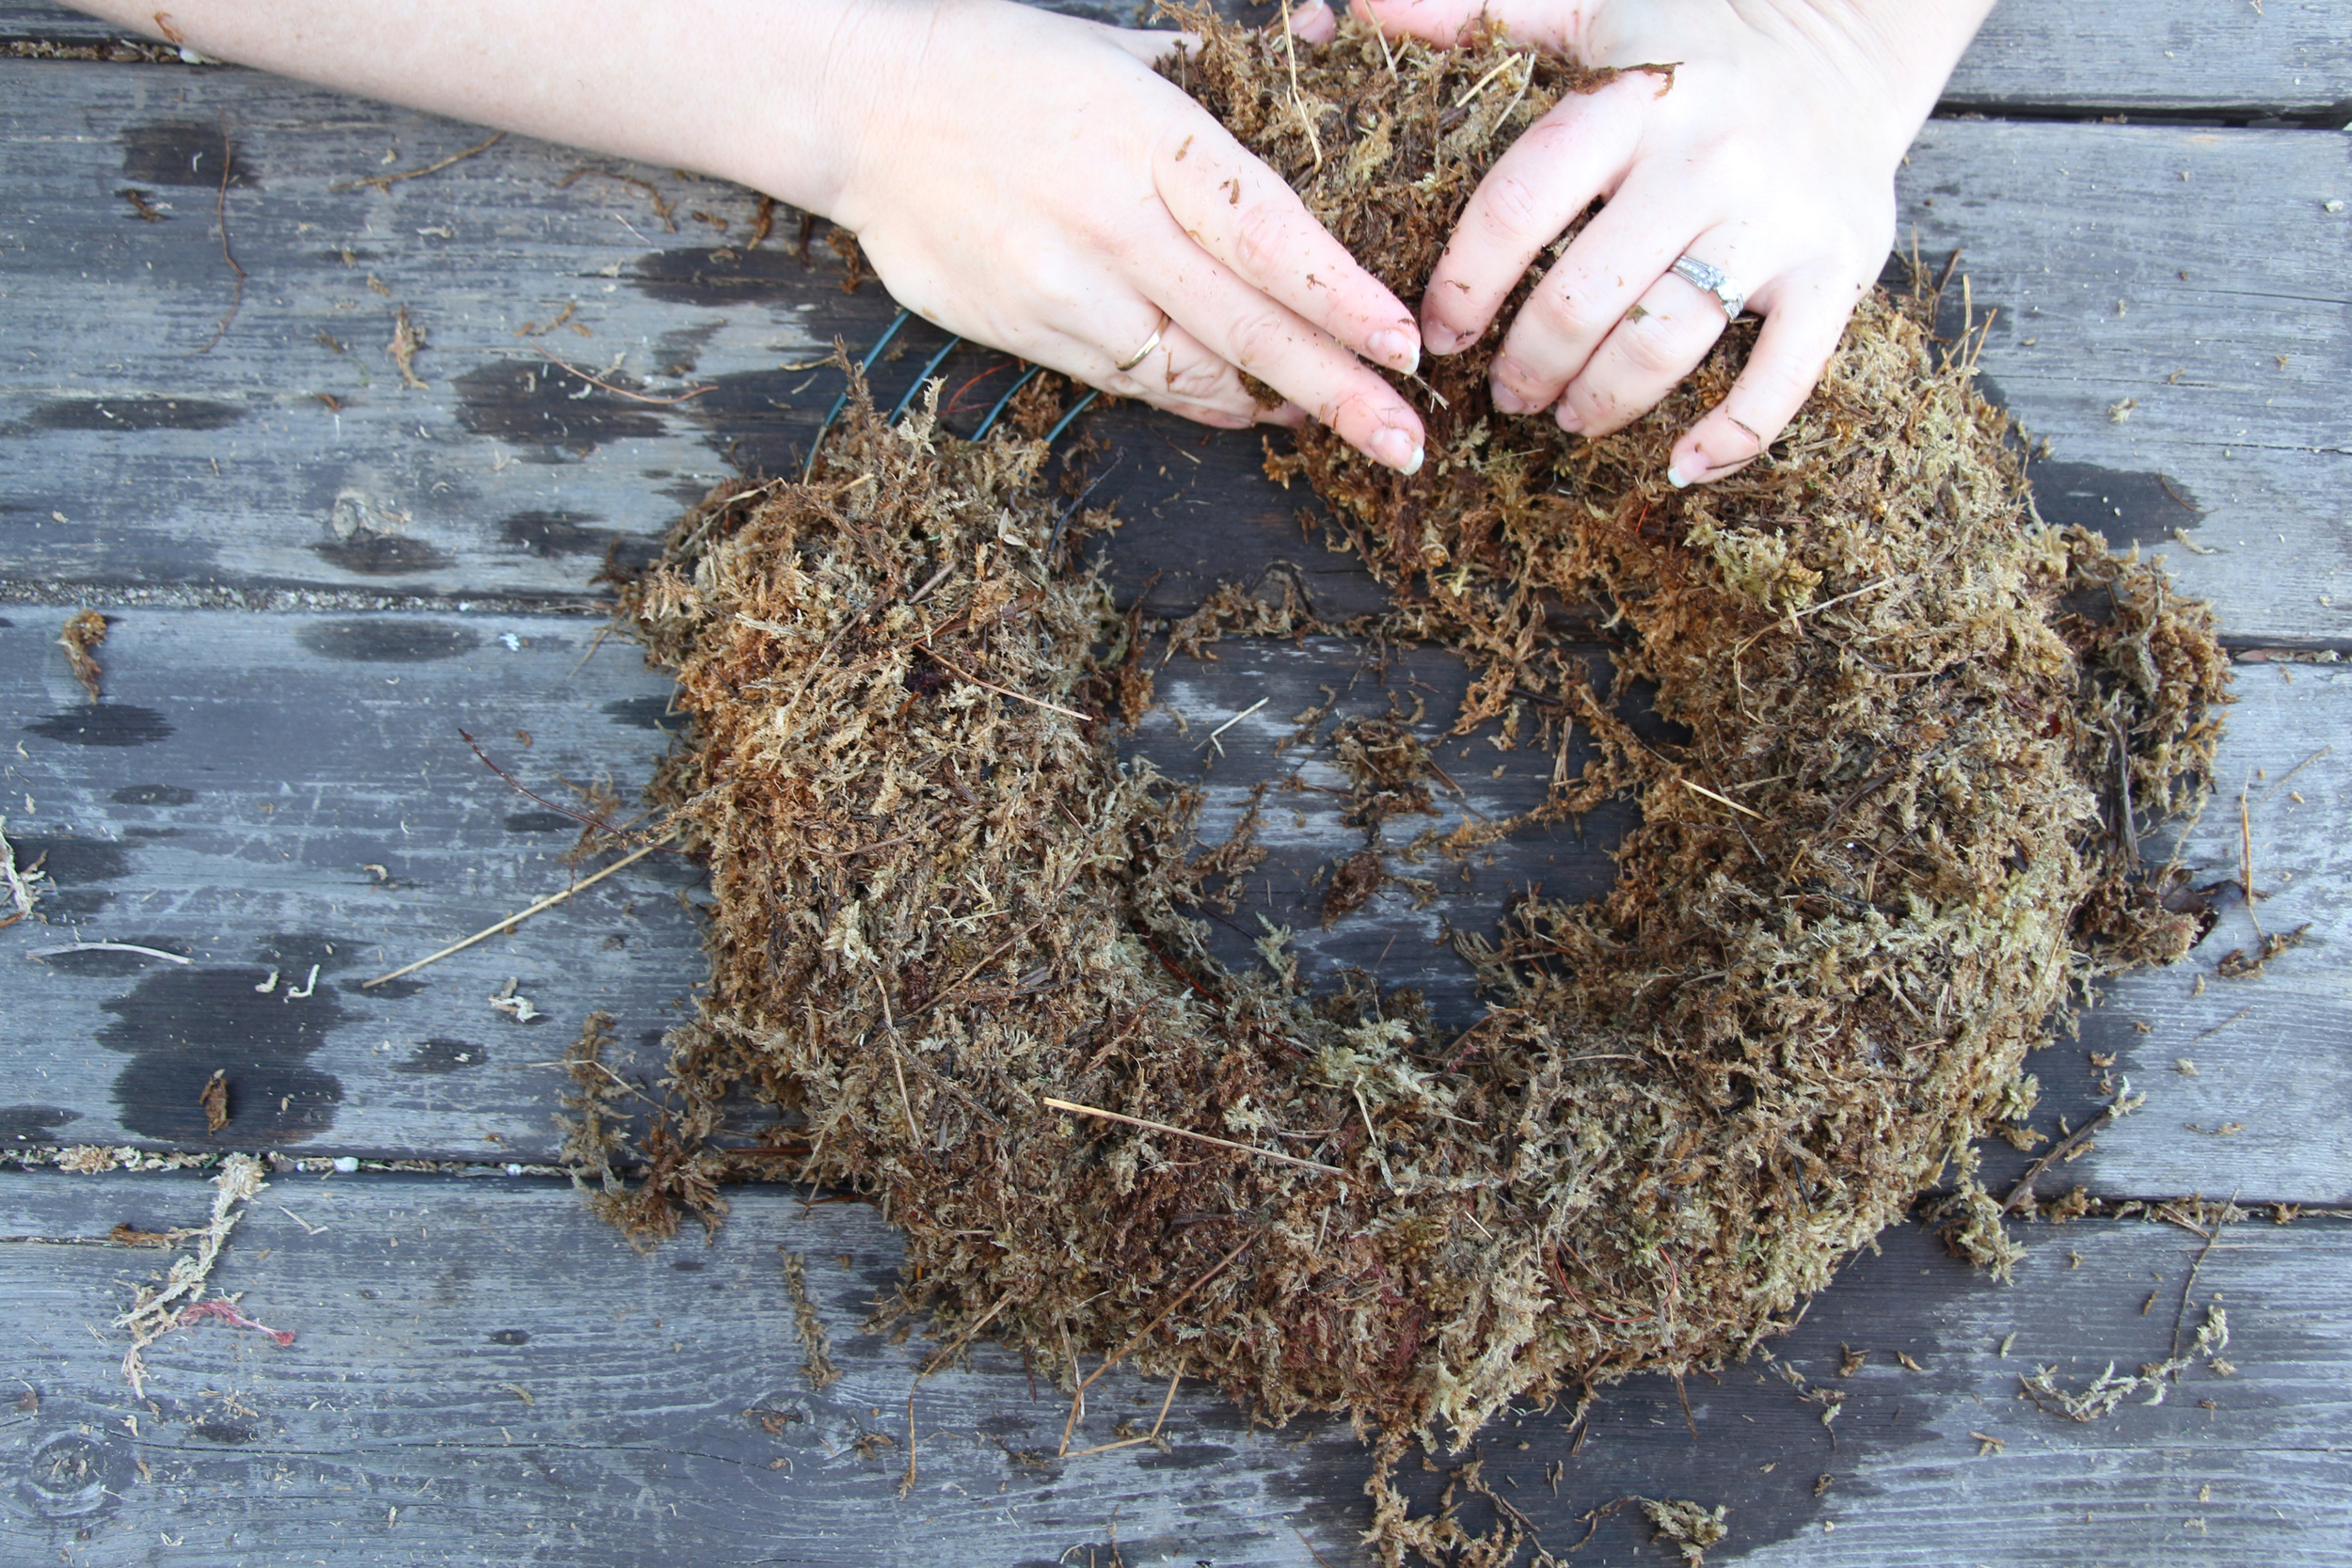
First, soak your sphagnum moss in a large bowl of water. Begin adding your moss to your wreath frame, squeezing out any excess water as you go.  As you work your way around the wreath frame, press the moss together as if you are creating a loaf. Once the entire wreath frame is covered with moss, tie the end of the jute twine to the back of the frame and wrap the moss with the twine. This will keep the moss attached to your frame. Once you have gone around the entire frame once of twice, tie off and cut your jute twine. 

Now we can start adding the tree trimmings. Cut small manageable pieces (about 6 to 12 inches long) from the larger branches.  Begin adding them around the wreath, sticking the freshly cut ends of the branches into the moss.

DIY Living Christmas Wreath with Succulents via Needles + Leaves

Use floral pins throughout to help keep the branches in place. Hold the wreath upright from time to time so you can see how the branches will fall when hanging. This will help you know where more floral pins are needed.

DIY Living Christmas Wreath with Succulents via Needles + Leaves

Keep adding branches around the wreath until you reach the point where you started.  Make sure to keep layering the branches to give the wreath volume. Continue to add floral pins when necessary. 

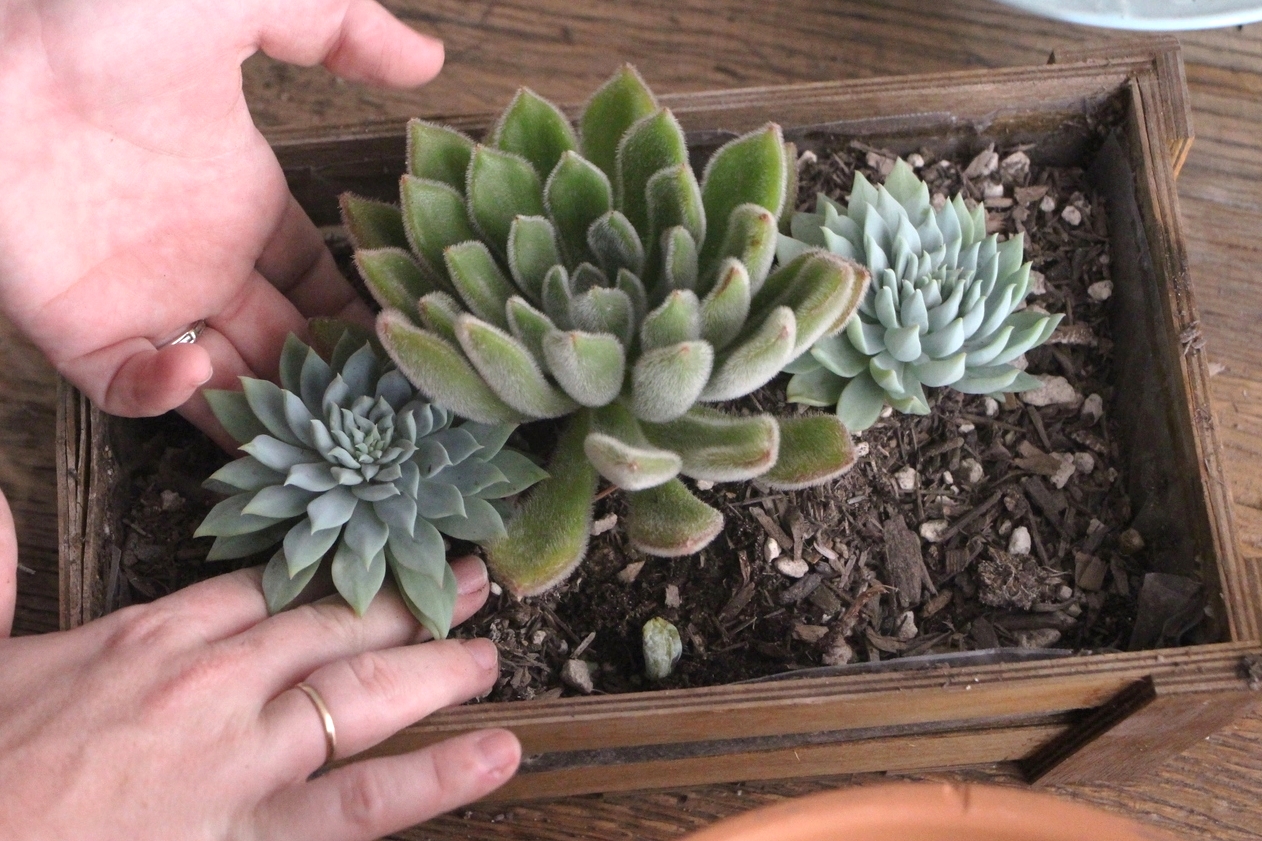
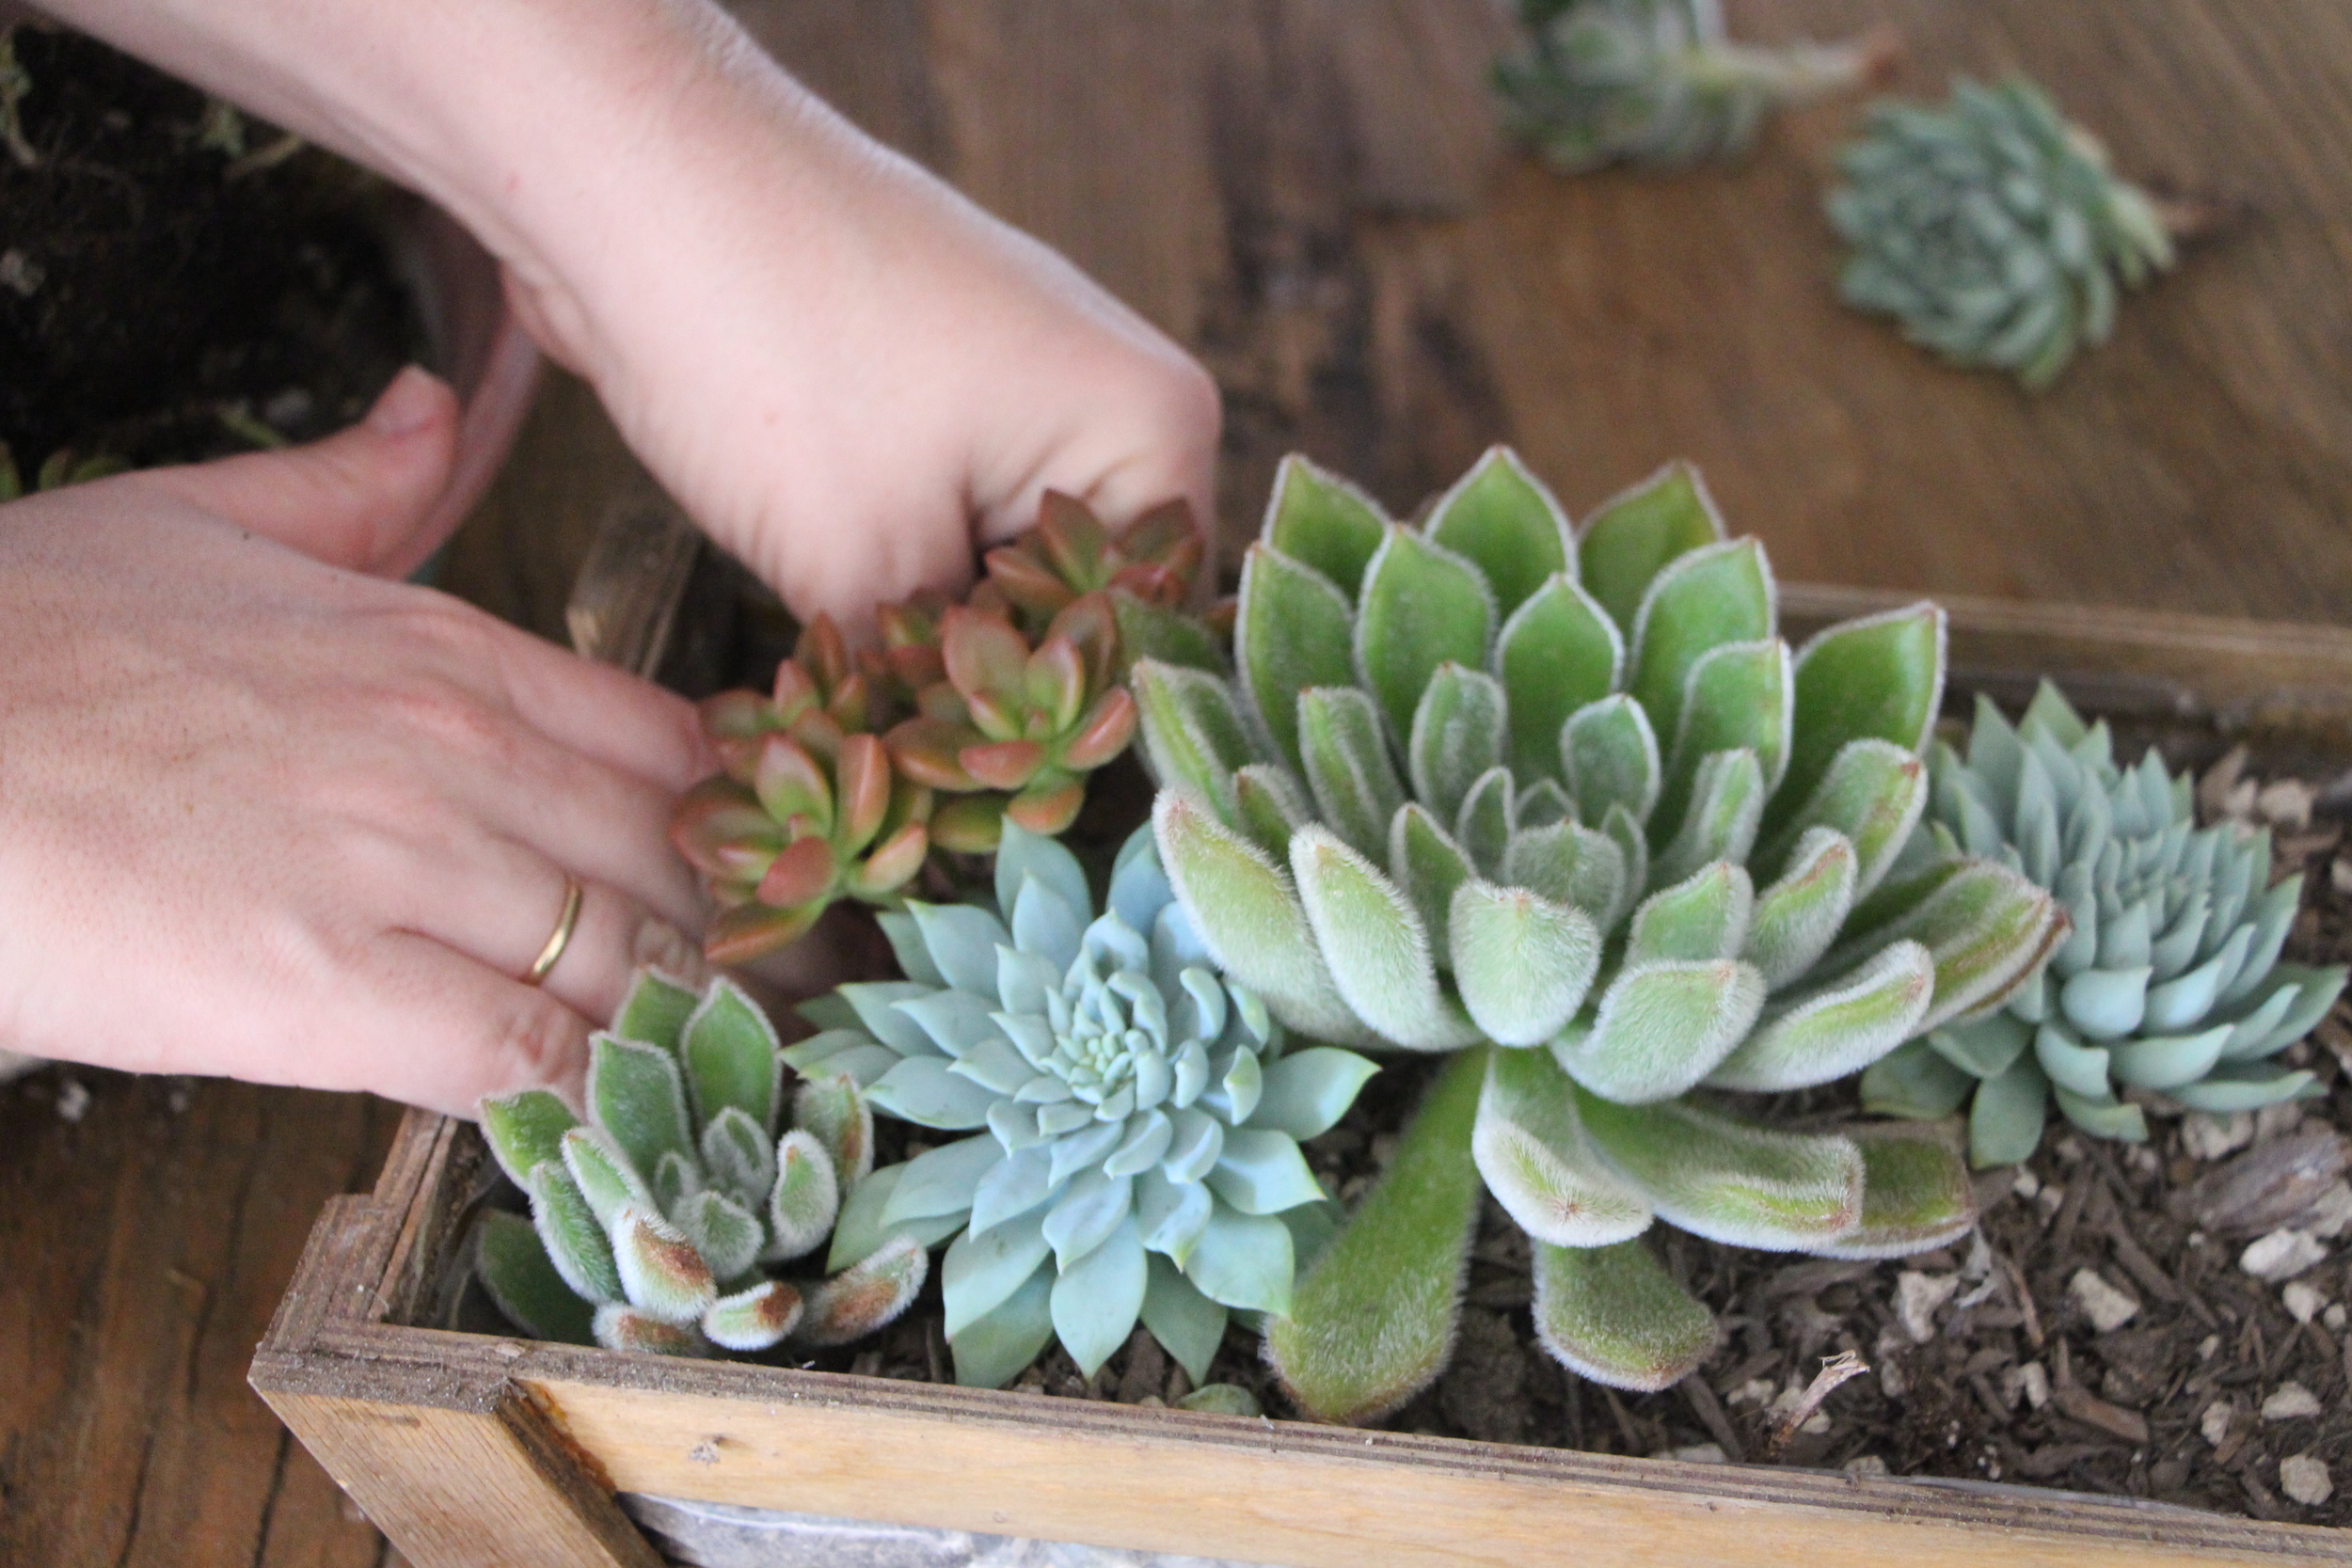
Once you have all the tree trimming secure on the wreath you can now start adding the succulents. You can add them where ever you'd like, along the top, spread throughout, or on the side.  We chose to add them along the side.

DIY Living Christmas Wreath with Succulents via Needles + Leaves

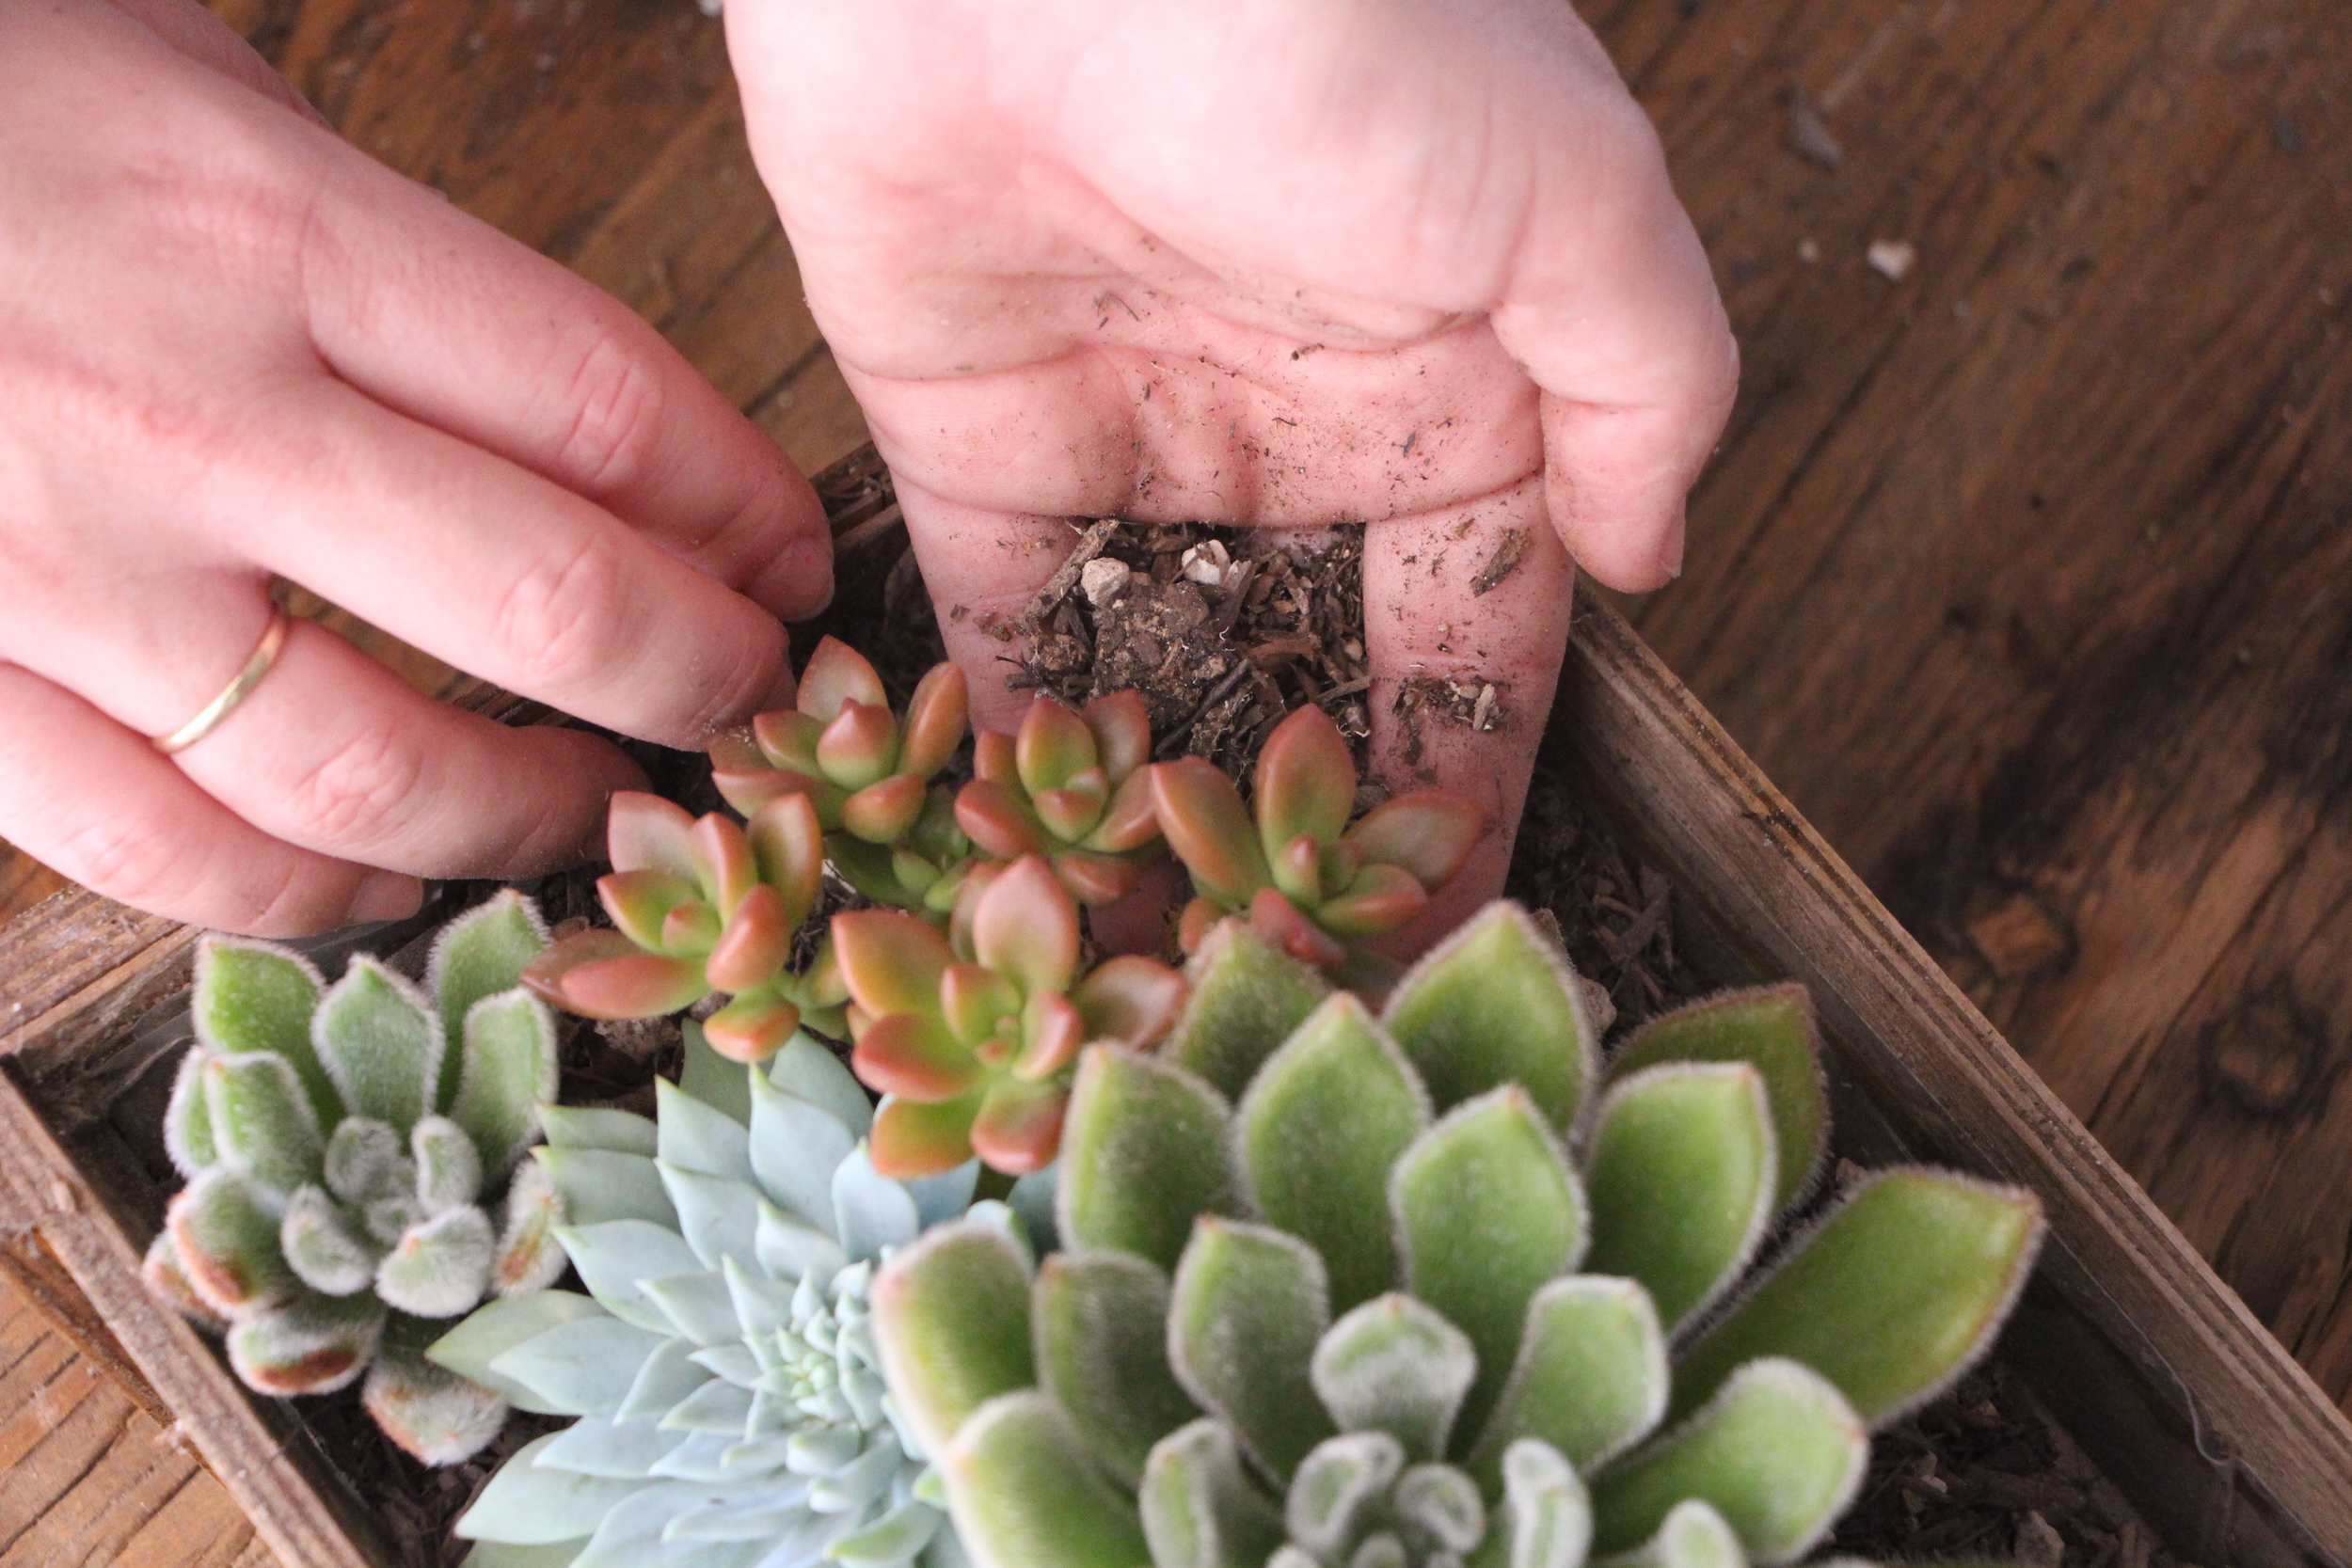
Use a pencil or your finger to make a hole for the stem, place the stem into the hole and use floral pins to secure it into place. We tried to keep the roots intact when possible, but if your stem is just too long, you will need to cut the roots off.  If you are using succulent cuttings for your wreath, you will need to use more floral pins to keep them in place until they have time to develop new roots. It usually take a few weeks to a month or so for cuttings to take root.  Keep adding succulents until you have created a design you like.

DIY Living Christmas Wreath with Succulents via Needles + Leaves

Now you a beautiful Christmas wreath! You can give it as a great home made gift or keep it for yourself to enjoy all season long! 

DIY Living Christmas Wreath with Succulents via Needles + Leaves

Living Christmas Wreath Care Instructions:

Remove your wreath from your door or wall and water it with a hose or watering can once a week or at least every two weeks. Leave it horizontal until it has had time to drain a bit and then rehang. Make sure your plants are getting plenty of bright indirect sunlight.

DIY Living Christmas Wreath with Succulents via Needles + Leaves

Arranging Succulents

how-to-arrange-succulents-needles-and-leaves-needlesandleaves_net.jpg

Arranging succulents is one of my favorite things! I love watching it come together and then seeing the finished project.  A lot of the arrangements you see in stores have the plants clumped together by type. This is where I like to change it up by spreading the different plant types around throughout the arrangement. 

I start by choosing all the plants I want to use.  Sometimes I just grab some from my yard or I'll pick up some new ones at the store. I usually try to keep it to 4 or 5 of the same type of plants, with one bigger beauty for the middle! 

how-to-arrange-succulents-needles-and-leaves-needlesandleaves_net.jpg

Fill up the container you are going to use with succulent soil about 3/4 of the way up. You will need to keep extra soil on the side to keep filling up the container as you add more plants. Place your biggest succulent in the middle. Dig a hole with your fingers and place the plant's roots and stem into the hole, then surround the plant underneath with soil. Try to keep the roots on all of the plants if you can, as this will help them begin to flourish in their new home quickly.  If you are planting cuttings be sure to let the ends callous over for a few days before planting them in soil. If you plant a fresh cutting in soil it may absorb too much moisture and rot.  

how-to-arrange-succulents-needles-and-leaves-needlesandleaves_net.jpg

From there, start adding plants on either side of the middle plant. I think of it as a mirror and add the same plants on each side. Remember every time you add a plant, dig a little hole, place the plant and surround it with the extra soil. With succulents, this can be a bit trickier than it sounds. Try your hardest to handle the plant by the stem, not the leaves, to avoid unsightly scratches and markings.  In addition, when you add soil, take care not to get it on the plants.  If you accidentally pour soil on top of a plant, gently blow it off or use tweezers to remove it without scarring your plant. 

how-to-arrange-succulents-needles-and-leaves-needlesandleaves_net.jpg

Try to fill in all of the empty space in your container so that no soil is showing. You can fill in the small spaces with smaller plants, which are always adorable! Sometimes it's difficult to create holes for smaller plants. In that case, try using a pencil to create smaller holes. 

I hope this tutorial helps you create a beautiful arrangement! If you have any questions you can leave a comment below or find us on Instagram under @needlesandleaves.

how-to-arrange-succulents-needles-and-leaves-needlesandleaves_net.jpg
how-to-arrange-succulents-fall-needles-and-leaves-needlesandleaves_net.jpg

DIY Succulent Crown

diy succulent crown

I'm a huge fan of flower crowns, but as a succulent lover, I've been dreaming of making a succulent crown for ages!  After struggling to find a "DIY Succulent Crown" tutorial online, I decided to just do it myself.  Naturally, I asked my mom to help me figure it out since she has experience working with succulents and wires. (See My Sister's Succulent Wedding.)  I went through my garden and chose some plants that I thought would work before heading over to my mom's.  If you read my mom's Garden Tour post you know she has a wonderful variety of plants, so I ended up using some of hers as well.  After choosing the perfect plants, we gathered our supplies, made some iced coffee, and began our project.

diy succulent crown project supplies

supplies you will need: 

succulents

floral tape


thick floral wire  

thin floral wire

pliers

wire cutters 

scissors

Step 1.  

Use your thicker floral wire to create a circle that fits around your head where you want your crown to sit.  Attach the wires by twisting the ends together and then wrap the circle in floral tape. 

diy succulent crown via needles + leaves

Step 2.  

After cutting the stems of your plants short with your scissors, insert your thin wire into the stem of each plant.

diy succulent crown via needles + leaves

Bend the wire.

diy succulent crown via needles + leaves

Wrap the stem with the end of the wire to strengthen it and secure it to the wire. Because succulents bruise and scar easily, you will want to be careful not to handle them too roughly during this process. 

diy succulent crown via needles + leaves

Step 3. 

Chose a plant to start with. Place it on the wire circle where you want it and wrap its wire around the circle. You can use your pliers to squeeze the wires tightly together and to pinch down the ends. 

diy succulent crown via needles + leaves

Continue choosing plants, placing them on the wire where you like until your circle is full of beautiful plants.  I decided to only do the front half of my crown, but you can do the full thing if you want.  Since I had exposed wires, I wrapped the back half in floral tape once more.

Note: Unlike flowers, some succulent leaves can snap off very easily, so be really careful during this process.

diy succulent crown via needles + leaves

I couldn't be happier with the way my succulent crown turned out!  I'm guessing it will last about a month. (Maybe longer!) Once the plants start to wither or root I will take it apart and plant them back in soil so that they can continue to grow. 

I hope my directions were clear enough, but if you have any questions please don't hesitate to ask! You can leave a comment here or find me on Instagram under @tawwni or @needlesandleaves

Portrait photography by Tayia Strain. (My amazingly talented little sis!) You can find more of her photos at Strain Photography.